Video Podcast Equipment – What the Pros Use in 2025

In 2025, video podcasting has moved from nice-to-have to non-negotiable. Audiences expect more than audio. They want to see real people, read body language, and feel connected. A study from Business Insider shows that platforms like YouTube now pull in over 1 billion podcast viewers, with more than 400 million hours streamed on smart TVs every month.
And big budgets follow that attention. According to Statista, podcast ad spend will hit $4.5 billion globally in 2025. Why is this important? Well, sponsors now pay up to 30% more for integrated video placements compared to audio alone. For brands looking to build trust, reach decision-makers, and drive real revenue, video podcasts do what audio alone can’t.
In this guide, you’ll learn what the pros are using in 2025, how to pick the best gear for your stage and budget.
We even compared JRE with The Diary of a CEO so you can get a better idea.
Let’s get started.
P.S.: Want to see exactly what gear to use this year to sound like a pro? Check out Building a Podcast Studio on Any Budget: What You Need to Sound Professional
Adopting a Video-First Podcast Strategy in 2025
In 2025, companies are not just adding video to podcasts. They are building video-first shows that open doors with senior buyers. Why? Because audiences do not just want to hear you; they expect to see you, read body language, and decide if they trust you.
Need help getting started with video podcasting? Here’s a quick video from Think Media explaining how to start a video podcast in 2025.
How Visual Shows Boost Trust, Reach, and Revenue for Complex Sales Cycles
When you put your host and guests on camera, with the right lighting equipment, mics, and multi-camera angles, you build credibility that a faceless audio file never could. This is critical for B2B brands with long sales cycles or high-ticket offers. Video podcasting helps B2B brands build trust faster by putting a real face to the message, which is essential when you are navigating complex sales cycles.
A 2025 survey found over 70% of video podcast viewers actively watch in the foreground, not just as background noise. That is time your brand gets undivided attention, a golden window for building authority and sparking word-of-mouth shares inside client teams.
Smart brands use video to:
Boost discoverability. YouTube might now be the number one podcast search engine
Increase watch time. LinkedIn and YouTube push long-form video with strong retention
Multiply reach with clips. Short-form reels and highlights are shared up to 20x more than static posts on LinkedIn. If you create a podcast, you can easily repurpose smaller chunks from it on your social media and get that higher organic share rate.
Unlock new revenue streams. Video podcasts open the door to YouTube ad revenue, sponsor integrations, and platform revenue share programs
Signal higher authority. A polished studio setup shows high-level guests and buyers that your brand is worth their time. That credibility pays off when decision-makers share your clips in Slack channels or board meetings.
Comparing Video Podcast Gear Tiers: Starter, Growth, Studio & Enterprise
Investing in video podcast equipment should never feel like guessing. The best teams match their setup to their production goals, brand reputation, and how much they plan to repurpose each episode. A solo B2B founder might do fine with an $800 webcam rig, while a global brand producing C-level roundtables may need a $12,000 studio with multi-camera angles and broadcast switchers.
Below, see what top brands actually use at each stage and how each upgrade level can pay for itself when you factor in increased reach, repurposed clips, and sponsor-ready production value.
Starter Gear: Under $800 for Solo Hosts
If you’re a solo creator or small team, you can look crisp and clear without overspending. Many creators start with a Logitech Brio 4K webcam ($199) for plug-and-play 4K, plus a simple dynamic mic like the Samson Q2U ($70) that works USB or XLR. Add an affordable 18-inch ring light or LED panel to keep your face evenly lit.
Pair this with free software like OBS Studio for live switching and local recording. This setup keeps you under $800 and is enough for LinkedIn Lives, YouTube uploads, and virtual interviews. For many B2B thought leaders, this starter kit can unlock your first wave of video content without waiting on budget approvals.
Example Starter Setup
Camera: Logitech Brio 4K
Mic: Samson Q2U USB/XLR
Lighting: 18" ring light or Neewer panel
Mixer: OBS Studio (free)
Estimated Total: ~$749

Growth Kit: Around $2,000 for Crisper Optics
When you’re ready to level up, upgrade your optics and audio for a more polished look. A Sony α6400 mirrorless camera ($850) with a Cam Link 4K ($130) lets you capture shallow depth of field and clean HDMI output. Pair it with a Shure MV7($250) for richer vocals and easy USB or XLR connection.
Add two adjustable Neewer bi-color LED panels ($37) for soft, studio-style lighting. A simple ATEM Mini switcher ($325) helps you run multiple inputs or screens. Altogether, a solid growth kit lands around $2,000.
The jump from a webcam to mirrorless optics can increase average watch time and perceived authority which are two factors that make a sponsor’s buy-in more likely.
Example Growth Setup
Camera: Sony α6400 + Cam Link 4K
Mic: Shure MV7
Lighting: 2 Neewer bi-color LED panels
Switcher: ATEM Mini
Estimated Total: ~$1,600

Why This Is an Upgrade:
Compared to the $800 starter kit, this setup unlocks cinematic quality. The mirrorless camera adds real background blur and low-light clarity. You also get smoother switching, better lighting, and more control over your voice and visuals which are key for interviews, solo content, and YouTube credibility. In fact, the jump in quality can increase average watch time and perceived authority; two factors that make a sponsor’s buy-in more likely.
Studio Package: Near $5,000 for Multi-Camera Polish
If you’re producing multi-person shows or roundtable interviews, invest in multiple cameras, better mics, and pro switching. A standard studio tier might include two Canon EOS R6 Mark II bodies ($1,899 each) for crisp 4K60 recording with strong autofocus and low-light performance.
Add two Shure SM7B ($439) dynamic mics, still the podcast gold standard for warm, broadcast sound. A Focusrite Vocaster 2 interface ($300) handles multiple mic inputs with built-in gain and mute controls. A GVM 800D 3-light kit ($259) provides balanced three-point lighting. Use the ATEM Mini Pro ISO ($545) to handle multicam switching and isolated recording.
A setup like this can transform any office corner into a polished studio for around $5,000.
Example Studio Setup
Cameras: 2x Canon EOS R6 Mark II
Mics: 2x Shure SM7B + Focusrite Vocaster 2
Lighting: GVM 800D 3-light kit
Switcher: ATEM Mini Pro ISO
Estimated Total: ~$5,400
Why This Is an Upgrade:
The jump from the $2K tier to this $5K studio package gives you multiple angles, smoother edits, and a broadcast-quality feel. With 4K60 video and studio mics, your show now competes visually and sonically with the best in the industry. It also gives you flexibility for in-person guests and full-length panel episodes.
Enterprise Rigs: $12,000+ for Live Events and Hybrid Productions
Enterprise teams and big-name shows rely on flexible rigs that scale. These setups handle hybrid events, remote guests, and automated camera switching. A top-tier system might include three Blackmagic URSA Broadcast G2 cameras ($4,615 each), which integrate natively with live-switching hardware.
Combine four Shure SM7Bs and a RØDECaster Pro II ($622) for multi-host panels with pro-level onboard processing. Use PTZ cameras and NDI streaming to automate angles and control cameras remotely. A powerful switcher like the ATEM Television Studio HD8 ($5,055) ties it all together. Expect to spend $12,000 or more, but you get multicam, live events, and studio broadcast quality in one.
Example Enterprise Setup
Cameras: 3x Blackmagic URSA Broadcast G2
Mics: 4x Shure SM7B + RØDECaster Pro II
Lighting: Aputure Light Storm kit
Switcher: ATEM Television Studio HD8
Estimated Total: ~$12,600
Why This Is an Upgrade:
This tier is for teams that need pro-level redundancy and automation. Compared to the $5K studio setup, you gain full remote control, auto-switching PTZ cameras, and studio-grade broadcast integration. It’s the same kind of setup used by top brands for webinars, conferences, and live-streamed interviews.
Choosing the Best Camera for Video Podcasting (2025 Buying Guide)
To choose the best camera for video podcasting, let’s first see what types of cameras you can pick from.
DSLR vs Mirrorless vs Camcorder: Which One Wins for Podcasts?
DSLRs: Reliable but Aging for Video
Why use a DSLR? DSLRs were the workhorse for early YouTube and podcast creators. They’re rugged, have affordable lens options, and deliver good static shots for short interviews. If you’re repurposing an older camera body you already own, it’s a solid way to get started.
The catch: Many DSLRs can’t record for hours without overheating, and they often lack fast Eye-AF or clean 4K60. They’re fine for short solo podcasts but less ideal for modern multi-angle video shows.
Best use: Short solo or two-person episodes under an hour, tight budgets, and simple sets.
Examples to consider:
Nikon D850 (~$1,896 body only - Best DSLR Camera Overall)
Canon EOS 6D Mark II (~$680 body only - Best Entry-Level Full-Frame DSLR Camera)
Nikon D3500 (~$428 body only - Best Beginner DSLR Camera)
Shows like early indie creators on YouTube built big followings with entry-level DSLRs but most have since switched to mirrorless for better autofocus and cleaner 4K.
Mirrorless: The 2025 Podcast Sweet Spot
Why go mirrorless? For most podcasters today, mirrorless cameras are the sweet spot. They’re lighter than DSLRs, have much better real-time Eye-AF, and capture that crisp depth-of-field look people expect on YouTube and LinkedIn. They handle hybrid sets well and pair nicely with switchers like the ATEM Mini.
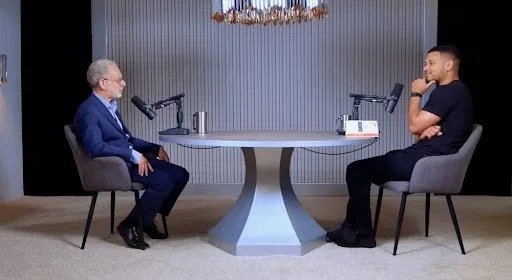
Take the Huberman Lab, which ranks at the top of Spotify and YouTube science shows. They run multiple Sony mirrorless cameras plus Blackmagic switchers to keep 4K video sharp for hours. Similarly, Diary of a CEO pairs a mirrorless setup with high-end Blackmagic cameras to get a cinematic studio vibe.
Best use: 1–2 hour episodes, interview shows, panels, and shorts you’ll repurpose on social media.
Examples to consider:
Sony α6400 (~$850 body) compact, reliable 4K30, strong Eye-AF.
Canon EOS R6 Mark II (~$2,500 body) top-notch low-light performance, 4K60.
Sony ZV-E1 (~$2,200 body) built for creators, great stabilization and AI-powered tracking.
If you want that modern, polished look that helps you stand out in feeds, mirrorless is your best bet.
Here’s a side by side equipment comparison for Huberman Lab and Diary of a CEO to give you inspiration:
Camcorders: Built for Long Sessions
“Camcorders are not as popular as they were, but they are more than capable of competing with modern mirrorless cameras and camera phones. The huge built-in zooms are a big plus in their favor - as is the fact that they are specifically designed for video, so are easier to hold and use for filmmaking.” - Chris George, The best camcorders in 2025: perfect all-in-one video cameras
Why choose a camcorder? Camcorders are made for uninterrupted recording. Unlike many mirrorless or DSLR bodies, they don’t shut down or overheat after an hour. They integrate easily with hardware switchers like the ATEM Mini, making them perfect for multi-camera shows that run for hours.
A classic example is the Joe Rogan Experience on Spotify #1 most-listened-to podcast globally from 2020 to at least 2023. Rogan’s team has used four Canon VIXIA HF G40 camcorders feeding into a Blackmagic switcher to handle marathon conversations without ever missing a beat.
Best use: Long-form interviews, panel shows, live streaming, and hybrid events where reliability matters more than shallow depth-of-field.
Examples to consider:
Panasonic HC-X2000 (~$2,200) crisp 4K60 with good zoom and ND filters.
Sony HXR-NX80 (~$2,300) professional-grade camcorder with fast autofocus and clean HDMI out.
If your show runs multiple hours or goes live often, camcorders deliver hassle-free shooting that keeps you focused on the conversation, not the tech.
So, Which One Wins?
If you want the best mix of quality, flexibility, and that studio feel, mirrorless is the clear winner for most podcasters in 2025. DSLRs still have a place if you’re starting with what you have. And when you need bulletproof, hours-long recording, camcorders are unbeatable. The key is matching your camera to your recording style then framing, lighting, and switching it well so every clip looks and feels pro.
Using Smartphones & Webcams as Budget-Friendly Podcast Cameras
If you’re just getting started or want a simple backup angle, don’t overlook what you already own. Your smartphone is probably the best budget-friendly podcast camera you have. Modern iPhones and flagship Androids shoot crisp 4K video, handle low light well, and produce great color straight out of the box.
Tools like the Camo app can turn your phone into a webcam with manual controls.
For plug-and-play setups, external webcams still work well. The Logitech Brio 4K is popular because it’s affordable, supports 4K30, and connects easily with OBS Studio or Riverside. Many solo creators rely on webcams for remote interviews, screen sharing, or extra angles that don’t need a cinematic background blur.
A basic lighting upgrade does more than any phone or webcam alone. A simple ring light or LED panel keeps your face bright and removes shadows, helping budget lenses look their best.
Best for: Solo hosts, remote interviews, portable or home studios on a tight budget.
What makes it work:
Cost-effective because you use what you already have
Easy to set up without extra capture gear
Flexible for backup shots, side angles, or mobile recording on the go
When you do upgrade, your phone or webcam can still serve as an extra camera angle. The key is to keep your lighting solid, your framing tight, and your message clear.
Pro tip: If you want to make sure your B2B podcast is thriving, we discussed how you can create a high-quality podcast with Peter Murphy Lewis, vice president at Experience Care.
Key Specs Explained: 4K 60fps, Clean HDMI, Eye-AF & More
Picking a camera is about more than the brand name on the body. The right specs make a huge difference in how your show looks and how easy it is to record week after week. Here are the essentials every video podcaster should understand in 2025.
Picking the Right Microphone & Interface for Crystal-Clear Audio
Great video gets people to click. Great audio keeps them listening. According to a study done by IAB, podcasts make even your advertising efforts more effective.

But that only happens if sound quality is top notch so people can actually follow your show.
In other words, your microphone choice can truly make or break how professional your podcast sounds. Here’s how to pick the right mic and interface combo for any setup:
Deciding Between Dynamic and Condenser Mics in Untreated Rooms
Your recording space should shape your mic choice. Dynamic microphones are the go-to for most podcasters because they’re less sensitive to background noise. They reject room echo, AC hum, and street noise, which makes them perfect for home studios without expensive acoustic treatment.
Condenser mics capture more detail and brightness but pick up everything around you. In a treated studio, they can sound clear and open. In an untreated room, they often sound thin or harsh. Either way, you'll most likely need a good shock mount to reduce vibrations and make sound more crisp.
Quick specs:
Dynamic mics: Lower sensitivity (around –50 to –60 dBV/Pa), built-in pop filters, cardioid pickup pattern.
Condenser mics: Higher sensitivity (around –30 to –40 dBV/Pa), often need phantom power (+48V), best in treated spaces.
Bottom line: If your space doesn’t have acoustic panels, stick with a dynamic mic. You’ll get more consistent results and spend less time cleaning up hiss or echo later. Here are some tips to record high-quality sound and video, even without a professional setup.
Reviewing 2025 Favorites: Shure SM7B, MV7 & Electro-Voice RE20
Some microphones have stood the test of time for a reason. Three dynamic mics dominate podcast recording setups in 2025.
Shure SM7B: The gold standard. Warm, broadcast-quality sound, excellent background noise rejection, and built like a tank. It does need a good preamp or audio interface to drive its low output. This is the mic you see on shows like Joe Rogan’s.
Shure MV7: Inspired by the SM7B but designed for people who want USB plug-and-play flexibility. The MV7 works USB or XLR, so you can grow into a pro interface later. Many solo creators and remote hosts love it because it delivers great sound without extra gear.
Electro-Voice RE20: Another broadcast legend. It has a slightly brighter tone than the SM7B and handles plosives well thanks to its variable-D design. You’ll see it on radio stations and roundtable setups where you need multiple mics in one room.
Using Interfaces with Built-In Processing (Vocaster 2, RØDECaster Pro II)
A good mic needs a good interface. For most setups, an audio interface with built-in gain, mute buttons, and processing saves you editing time and keeps you sounding polished.
The Focusrite Vocaster Two is a popular pick for solo or two-person shows. It has auto gain, a mute switch, and onboard EQ that cleans up your voice before it hits your recording software.
The RØDECaster Pro II takes it further. It works as a full podcast production studio with four mic inputs, sound pads, mix-minus for remote guests, and onboard recording. It’s perfect for multi-host shows or creators who want to add effects without learning a full DAW.
Tip: Always check that your interface has enough clean gain for mics like the SM7B and RE20. They need more juice than budget mics, and a weak preamp can make your audio noisy. After all, high production quality means more people sign up to your podcast.
How They Compare: Podcast Interfaces
Quick takeaway:
Use the Vocaster Two if you’re a solo host or small team that wants clean sound with minimal setup.
Upgrade to the RØDECaster Pro II if you need multi-host mixing, onboard recording, and pro-level processing without extra software.
Lighting & Set Design That Impresses C-Suite Guests
Your lighting and backdrop do more than look nice on screen. They signal to high-level guests and buyers that you’re credible and prepared. Bad lighting can make even the best camera look flat. Smart lighting and set choices help you look like a premium show, even if you’re recording from a home office.
Setting Up Three-Point Lighting on Any Budget
A simple three-point lighting setup makes the biggest difference. Here’s how it works and what gear to use at each tier:
Key light: Your main light at a 45-degree angle to your face.
Fill light: Softens shadows on the other side.
Back light: Separates you from the background.
Starter option:
Use two Neewer 660 bi-color LED panels (~$200 total) and an 18-inch ring light for your fill. These panels let you adjust brightness and color temperature to match your room.
Mid-range option:
Upgrade your back light with an extra GVM 800D LED panel or a small Aputure Amaran (~$150–$250). This creates more depth so you don’t blend into the background.
Pro option:
Step up to an Aputure Light Storm C120D II (~$749) for your key. It gives you broadcast-level output and natural skin tones. Shows like Diary of a CEO and Huberman Lab use studio lights with high CRI ratings to make guests look sharp.
Here’s a good example:
Adding Brand-Consistent Backdrops, Furniture & Accent Lights
Once your lighting is right, make your space match your brand. Top shows keep sets simple but intentional:
Use neutral colors: Avoid busy or distracting patterns.
Add practical lights: Desk lamps, wall sconces, or LED accent strips add warmth.
Keep it clutter-free: Hide cables and gear from the frame.
Frame your shot: Use props that signal your niche; books, a branded mic flag, or a subtle company logo on a shelf.
Tip: Pick a backdrop you can control year-round. Natural light can change your look minute to minute. A consistent set means you spend less time tweaking during edits. Of course, the most important thing is to create relevant content that answers your audience’s questions.
Quick Lighting & Set Design Guide
Tip: For any tier, keep your lights in the same color temperature range so your skin tones stay natural on camera.
Running Multicam & Live-Switching Workflows Without a Crew
Pro podcasts in 2025 often use multiple camera angles to keep viewers engaged. But you don’t need a full-time video team to make it work. With smart switchers, browser-based tools, and PTZ cameras, you can handle multicam streams solo or with a small team.
Choosing Hardware Switchers: ATEM Mini vs. Television Studio HD8
A hardware switcher makes live-editing possible without bogging down your computer. The Blackmagic ATEM Mini line is the industry standard for solo podcasters and small teams. It’s affordable, portable, and works well for up to four HDMI camera inputs.
ATEM Mini (~$295): Good for beginners who want to cut between a few cameras and screen shares.
ATEM Mini Pro ISO (~$895): Adds isolated recording for each input so you can fix edits later.
ATEM Television Studio HD8 (~$3,000+): A serious upgrade for larger studios and live events. You get more SDI inputs, built-in streaming, and audio mixing for hybrid panels.
Quick comparison: Use the Mini or Mini Pro ISO if you run 1–4 cameras in a small studio. Upgrade to the HD8 if you want redundancy, better audio control, and the flexibility to scale your show or produce webinars for clients.
Streaming Remote Guests with Browser-Based Mixers (Riverside, StreamYard)
Even the best hardware switcher needs a remote-friendly workflow. Tools like Riverside or StreamYard let you bring in remote guests with good video and audio quality. You can record each guest locally on their end and then download separate high-res tracks for editing.
These cloud-based studios often include basic scene switching, overlays, and graphics. This means you can run a clean multicam show even when your guests are in different cities.
Pro tip: Always coach your guests to use a solid webcam, mic, and lighting. A weak guest feed will drag down the entire production, no matter how good your setup is.
Automating Angles with PTZ Cameras & AI-Powered Auto-Switching
PTZ (pan-tilt-zoom) cameras and AI auto-switching make multicam setups feel like they’re run by a full crew, even if you’re solo. These tools handle camera movement and cuts for you, so your show looks dynamic without constant manual switching.
How PTZ works:
PTZ cameras let you control angles and zoom remotely. You can preset different shots like wide group, tight single, side angle and switch with a hardware controller or software. Some PTZs have built-in tracking that follows the host’s face or whoever’s speaking.
Popular options:
Lumens VC-A61P PTZ Camera (~$2,500): Reliable for podcast studios, smooth pan and tilt, integrates with NDI and switchers like the ATEM Mini Pro ISO.
OBSBOT Tail Air PTZ (~$499): AI-powered tracking camera for solo creators. Follows the host as they move, perfect for standing or moving shows.
For more options, take a look at this video by Monte Weaver breaking down 10 Tips For Choosing The Right PTZ Camera:
How real shows use this:
Large panel podcasts and hybrid event streams use PTZ cameras to capture multiple speakers without hiring extra camera operators. Some B2B brands run a Television Studio HD8 switcher and three PTZs, cutting automatically based on who’s talking; the same approach you see in broadcast newsrooms.
AI-powered switching:
Platforms like vMix, Livestream Studio, or OBS with plugins can auto-switch based on audio cues. For smaller studios, Riverside and StreamYard now offer basic speaker detection that cuts between guests during a remote show.
Bottom line: A PTZ setup gives you more production value and angles, without hiring extra hands. Combine one or two smart PTZs with a solid switcher and your show runs smooth, even during long interviews or live Q&A.
Automating Post-Production with AI Tools in 2025
A polished video podcast used to mean hours of tedious editing, clipping, and reformatting. In 2025, AI tools make this faster and more repeatable so you can publish consistently and get more out of every episode.
Cutting Edit Time Using Tools like Descript
The average long-form podcast takes 4 to 8 hours to edit manually. Tools like Descript, and Auphonic now do the heavy lifting.
Descript edits audio and video by text transcript. Delete filler words, tighten long rambles, and generate short clips in minutes. Many solo shows and small teams now run first cuts in Descript before final pass edits.
Auphonic automatically levels audio, reduces noise, and balances volume so you sound good on every device. Even big-name shows use Auphonic to catch inconsistencies at scale.
Auto-Generating Shorts, Captions and Multilingual Dubs
A single episode should live everywhere your audience hangs out. Tools like Opus Clip, Captions.ai, and Riverside’s Magic Clips help you turn long episodes into multiple short-form pieces that drive real reach.
Opus Clip finds the best moments and adds auto-captions and layouts for TikTok, Reels, and LinkedIn.
Captions.ai cleans up dialogue and creates subtitles in multiple languages, so your clips stay accessible.
Riverside’s new repurposing tools let you highlight pull quotes and social-ready clips right after you record.
Shows that do this well often see clips outperform the full episode by 5 to 10 times. For example, HubSpot reports that short-form videos now have the highest ROI of any social media content type.
Designing a Brand-Forward B2B Podcast Studio on Any Budget
A clean, credible studio setup shows your guests and viewers that you’re serious about your brand. You don’t need a massive budget to look the part. Start by treating your space for better acoustics. Simple foam panels, rugs, and curtains can reduce echo, making your audio clearer without expensive renovations.
Keep your set styling aligned with your brand. Neutral colors and clean lines look good on camera and don’t distract from your guest or message. Many B2B teams use a simple backdrop with practical accent lights, a shelf with a few brand elements, or a subtle logo on a mic flag.
Choose furniture that works on camera and feels comfortable for guests. A sturdy table, matching chairs, and soft practical lights go a long way. Hide messy cables with clips and sleeves to keep shots clean. For longer interviews and live recordings, build redundancy into your setup by using surge protectors, battery backups, and double-check your recordings on separate cards or cloud backups. These small details protect you from technical surprises and make your guests feel they’re in good hands.
Of course, follow key podcast KPIs to make sure you’re on the right track with these changes!
Is Your Video Podcast Ready for the Next Level?
Do you know if your current gear truly reflects the authority your brand deserves in 2025?
Are you confident your studio setup will earn trust and keep high-level viewers watching?
If not, Content Allies can help you use what the pros use so your video podcast becomes a growth engine, not just another channel.
Let’s get in touch and see how we can scale your podcast!
Frequently Asked Questions
What is needed to do a video podcast?
At minimum, you need a camera that shoots at least 1080p, a good microphone, proper lighting, and a computer or recorder to capture and edit your video and audio. Most podcasters use a webcam or mirrorless camera, a dynamic mic, a basic LED light, and simple editing software like Descript.
How much does a video podcast setup cost?
Your budget can start under $800 for a solo host with a webcam or phone, a USB mic like the Samson Q2U, and a ring light. A solid growth kit with a mirrorless camera, dynamic mic, interface, and better lights usually lands around $2,000. Pro studios with multi-camera rigs, switchers, and full lighting can run from $5,000 to $12,000 or more.
How many cameras do you need for a video podcast?
One camera works fine for solo shows or simple interviews. Two cameras add a second angle for guest reactions and editing options. Big panel podcasts and hybrid events often run three or more cameras for wide shots and close-ups, often with a hardware switcher to make live cuts easy.
Do you need headphones for a video podcast?
Yes. Studio headphones help you hear your levels, catch mic pops, and monitor your guest’s audio in real time. Even simple in-ear monitors or closed-back headphones can prevent audio bleed and save you editing headaches later.
Does my podcast need a video component?
In 2025, most shows that want real reach and trust with B2B buyers need video. YouTube is now the largest podcast search engine, and platforms like LinkedIn push video shows more than audio-only ones. You can still run audio-only if your listeners are used to it, but adding video opens up new audience, ad, and clip opportunities that audio content alone can’t match.